Monday, November 7, 2011

Honey Nut Scones - SRC


Has November also been passing you by? What???? Halloween is over already and you haven't even planned your Thanksgiving feast yet?? Well there are only going to be 8 more people over + plus the 4 of us... I totally hear ya! Diwali was like that for me...

But...

This is what I love about the last two months of the year... I so look forward to the holidays and festivity and everyone's cheerie mood! In India this starts in October with Diwali - the festival of lights. The house is going to smell of a varieties of cookies, sauce, chicken / turkey. biscuits and Christmas cakes! There is going to be  a lovely NIP in the air... and some LOVE and lots of gifts - maybe some SMALL.

Well, this month I was just almost not going to make it in time for my Secret Recipe Club assignment. I was given the blog Tea and Scones and it was full of exciting recipes to read. It was full of yummy recipes from Dorie Greenspans books (always a pleasure) and lots of 30 minute pasta recipes that looked yummm too! I had a huge choice but I chose Scones as I thought they are versatile - can be made savory or sweet and can go well with any Christmas or Thanksgiving Brunch... not being a show stopper but definitely an essential to have around turkey and gravy.

Honey Nut Scones are featured in the book Baking from My Home to Yours and they are really simple to put together! I adapted them minimally to the ingredients I had on hand and shaped them like biscuits... since they didn't turn out too sweet I thought they could easily be served at a brunch.

I baked half the quantity as scones are usually not my specialty but they just melted in my mouth and I didn't add the egg...

Ingredients:

1 egg (optional)
1 tablespoon honey
1/4 cup whole milk
3/4 cups all purpose flour
1/4 cup ragi flour (original - whole wheat flour)
1/2 tablespoon baking powder
1/4 tsp baking soda
4 tablesppons cold butter
1/4 cup ground almonds (original - walnuts)

Makes about 4 medium sized biscuits

Steps:
Stir the honey and milk together.

Whisk the dry ingredients together. Add the butter and rub it in with your fingers till all of it is mixed and looks as small as peas and is all pebbly and mixed up.

Pour the liquid ingredients in and mix with a fork until just combined. Add the ground almonds and mix it together. Pat together into any shape you want - I made discs but you can make the typical triangles.

Bake in a pre-heated oven for 15-20 minutes at 180C until nice and browned.

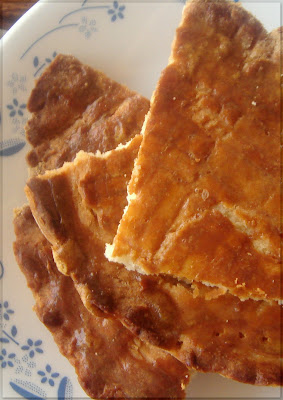
Serve with butter, jam, honey or dip into gravies and enjoy savory with your meal!It has a really subtle sweet and nutty flavor to it!


Monday, October 31, 2011

Apple Almond Cake


Can't believe we are heading towards 2012 at break neck speed... 

Oct in India is a festive season - full of festivals - the biggest one being Diwali - like Christmas all the buildings and houses are decked with pretty lights, lanterns and flowers. I made rangoli with fresh flowers this time and the fragrance of that and the scented diyas (yes, you read right) kept the house looking pretty and smelling good!

After the week long break of feasting, crazy card nights, losing money and then making some, lights and lots of partying followed by my son's 3rd Birthday Party, tons of gooey chocolate cake and lots of Halloween Candy - I am so ready for a Breezer - oops I meant BREATHER!

I think we need to usher in November a bit slowly so we can savor December in all it's glory - the cold weather, the nice sunny days with a cold breeze, lots of Christmas festivity and holidays and bring in the New Year with a bang.

Delhi is flooded with apples currently and it's not exactly fall but I wanted a warm cinnamony something to keep me going as it gets cold early in the morning and late evenings... so you need something to tuck in with your coffee or tea.

I read a lot of great reviews about an apple cake from Dorie Greenspan's book and went about adapting it minimally to suit my needs. It was real easy to put together and I didn't even get my electric mixer out for this.


Ingredients
1/2 cup all purpose flour
1/4 cup ground almonds
3/4 tsp baking powder
100 grams salted butter
1/2 tsp vanilla extract
3/4 cup brown sugar
2 large eggs
3/4 cup apples finely chopped

Prepration
Center a rack on the oven and pre-heat it to 180C.

Butter a large loaf tin and prepare. 

Whisk together the dry ingredients. Melt the butter. Whisk together the eggs and then add sugar and whisk. Now I added a third of the dry ingredients and melted butter alternatively till completed incorporated. 

I then used a rubber spatula to fold in the apples.

I decorated the bottom of my loaf tin with slivers of apple and brown sugar and poured the batter over this. And baked it for about 40 minutes.

The pictures do no justice to this cake as it was moist and had a very nice nutty flavor from the almonds. It wasn't too apple or too sweet and just perfect to enjoy at anytime!

It made a hand snack for the the toddler to take to school too and the bonus that it had fruits and nuts had me beaming at my genius!

Wednesday, October 12, 2011

Will you walk into my parlour... to share some BROWNIES?


                                       Will you walk into my parlour?" said the Spider to the Fly,
                               'Tis the prettiest little parlour that ever you did spy;


I remember these words from a poem we read long, long time ago in school... and though the spider is actually being mean here...I say these words in a nice way!

Sometimes you have a gazillion thoughts running through your head at one time and you are trying to fit them all into the 2 hours you have while the toddlers at school:

Running ten minutes late to the gym, the treadmills going to be gone

I need a pedicure

My son needs a new bottle for school ASAP

But we are out of veggies & fruits for the week - and it's only Wednesday?

What about a quick stop after groceries at that pretty shop to check out some baking equipment?

And the dry cleaning has to be picked up by Friday

And we all know what the priorities are... as we rush through errands before the toddler gets off from school.

BUT

Sometimes, your day is just long and you do not want to drag yourself out of bed - you just want to speak to your BFF over the phone, enjoy an extra cup of tea and eat another brownie.  

BFF's change over time and time flies... when I was younger (read teens) I was always at logger heads with my MOM and didn't want her anywhere near my parties / school work / classes. I felt she embarrassed me... and NOW I am always clambering for her attention and need her opinion on most things. She is the one person who will always be there to speak to you when you call, answer your calls back, give her opinions, fight with you and reason with you!

My mom doesn't live in the same city as me and neither does she like chocolate much but I am sure she would have had another cup of tea and a brownie with me if I had insisted... that's what BFF's are for!

These are just a box brownie mix with extra chocolate chips thrown in for good measure :) - hope they warm up your tea-time like they do for me!


Monday, October 10, 2011

Banana Chocolate Cupcakes - Secret Recipe Club


What's it about playschool and toddlers? A cold or cough or "a new bug" every 3 weeks, early mornings chases around the house with my son in his PJs and I following him with his brush, school bags being left behind in the elevator... I barely got time to recover from the sleepless nights in April when playschool started and by the time I had a chance to put my head up, we were already in October!

The year has not ended yet, but has been very difficult for my family with a lot of close members not being around anymore and two going in a very sudden way leaving us surprised at how short life can be.

There has been a sudden awakening around me to appreciate life more and become a better person. Yes, I am still snappy at that time of the month; No, I haven't suddenly become Ms Goody-Two-Shoes; I still lose my cool at small things when I having a bad day - BUT I have started to sit up and look at the simple pleasures life has to offer so it doesn't race you by.

Walking hand in hand with your little one picking up flowers, picking up your toddler from school with a treat (chocolate cupcake), getting up early in the morning to enjoy your morning cuppa in a quiet house before everyone is up or just enjoying some quiet sit-down time with your spouse away from the maddening social commitments.. this list can just go on and on.

And, life I realized is as simple as you make it to be...So go on and do something you really want to but haven't been able to do for a while 'coz of your super crazy schedule!

When I chose this recipe from http://eggscreamandhoney.com/, I wanted something kid friendly that my son could bake with me 'coz he thinks he is my lil helper and likes to whisk away in the bowl while I add the ingredients. I was not going to be a MANIAC and look for perfection but these came out pretty perfect if I may say so!

The Secret Recipe Club is the brainchild of  Amanda Formaro where you get assigned to a secret blog and get to cook from it! Excited... you can learn more about it from the links provided! A great initiative to get to know more bloggers and try out new recipes!

The original recipe is here - http://eggscreamandhoney.com/2011/06/21/banana-cupcakes-and-peanut-butter-icing/ - I tweaked it a bit here and there depending on what I had on hand!

Ingredients
100 grams salted butter
1 cup flour ( About 3/4 all purpose and 1/4 millet flour and 2 tablespoon cocoa powder)
3/4 cup granulated sugar
2 eggs
2 tsp baking powder
2 very ripe bananas
1 tsp vanilla

Makes 6 cupcakes and takes about 30 minutes from start to finish. A great way to get your child involved.

Method:
I sat my kid down in the middle of the kitchen on a splat mat with a big bowl and whisk - in went the bananas - mash, mash, mash. Then went in the melted butter and a lot of vigorous whisking. Then went in the sugar - I had to help here a bit so that the mixture was a bit creamy and the sugar was dissolved. The eggs and vanilla were broken and whisked by me in a separate bowl and then whisked into the bowl by the toddler. The flour all in one heap, into the bowl and all mixed together.

WHAT A FORGIVING RECIPE! The toddler opted for whisking after all the effort and I went back to lining the muffin tin and put the cupcakes in for 25 minutes in a 170C preheated oven.

We just used a icing sugar and warm water to make a paste, put it in a baggy and most of what you see is what my son did with me holding his hand... life is all about having fun! Enjoy with your loved ones with a tall glass of milk or hide it in the snack box for a warm hug when they get back from school!


Saturday, June 25, 2011

Italy - here, there and everywhere...

I wanted to bake something for you all. Baking is all that's always on my mind. But back from a vacation a woman's gotta do what a woman's gotta do = buckets and buckets of laundry (especially having traveled to Europe with a  toddler), toddler jetlag = wierd sleep schedule, tons of cleaning up, haywire help schedule= no help at all and this could go on and on and on...

Stunning architecture, steeped in culture, a complete harmony of the cosmopolitan embedded in historic and a gastronomic paradise - truly describe Italy. Our trip started in Rome and took us through Siena, Florence, Montelpulciano and parts of the Tuscan countryside ending in Venice (for any details on how, where, what please email me). I did a lot of detailed research on the hotels I chose and why I did and all of them were excellent choices.

Hotel Michelangelo, Rome was a 2-minute walk from Vatican City, a great 4 star, with well stocked and very clean rooms offering a view of St. Peter's Basilica, a hearty breakfast and helpful staff - all requirements when travelling with a toddler.

Our hotel was away from the sites yet just 10 minutes away from every place we wanted to be at - picking up our car from Roma Termini, eating and chilling at the Spanish Steps. Being able to sit and absorbing the beauty of the Basilica from outside is truly a remarkable experience but little can you guess the splendor in store for you on the insides - a true visual orgy. Though it was my second time inside the Basilica, I was truly spellIt was astounding to sit at the fountain and just stare at the Basilica and its fine architecture.

Villa Elda, Siena was our home while we were in Tuscany and we couldn't have stayed in any place better. It was near the Fortress, very close to the Basilica & Piazza and a short walk from the Duomo. It had a beautiful terrace & garden - excellent breakfast and cappuccino, huge modern rooms, very friendly & helpful staff who gave us excellent tips & suggestions and made our trip truly memorable.

One of the best Piazza's where we chilled for an entire afternoon with food and fine and the toddler running around in glee. Less touristy than Florence but very lively and full of life.

Suites Torre dell'Orologio, Venice, right at St. Marks was the most gorgeous hotel we lived at. Was sad it was just for a day... a gorgeous suite in a by-lane just near the clock tower giving us a very homely feel (thank you to a reviewer on TripAdvisor we found our hotel in 2 minutes) in the midst of the hustle & bustle. Friendly staff, great eateries all around - couldn't have asked for more.

Rialto & St. Marks were the true touristy things to do but with one day on hand and a tiring journey to Venice we couldn't have achieved more. Just sitting under the stars at St. Marks and listening to the gorgeously played orchestra is a a blissful and romantic experience. Venice has become really tourist and you need to really save yourself from the 100 Euro Gondola rides which we couldn't!

I have stressed on the breakfast everywhere 'coz you need a huge breakfast to take off on all your walking adventures throughout Italy and don't want to keep stopping for food, water and coffee. Our usual was eggs, sausages, a variety of pastries, fresh juices and excellent coffee. We always carried some fruit or snacks for the toddler to tide him till lunch time and that the mornings were best for places that had entries or lines. CAn't stress more or how much our umbrella stroller helped us on our trip - we couldn't have survived without it - nap times were a cinch.

We had great recommendations for restaurants and staying away from the touristy places helped. The Hop On Hop Off bus was great in Rome, maybe July wasn't peak tourist season... we couldn't have seen Rome without it.

Now the part you have been waiting for our the pics. I didn't get any food pics because we were always ravenous... but I did get pics of an Italian Restaurant Kitchen. And I got some lovely pasta tie & die colored green pasta and animal shaped pasta to humor me. Wish I gotten back some cheese, olive oil, marinated tomatoes but we had no place after packing our bottles (only 2) of wine.

The first cut of pictures have only Rome in them... you will have to wait and watch the space for more. Also, the sky's were going to pour almost everyday we were there that's why the dreary skies...


Wednesday, June 15, 2011

To make up for my absence... and the bad picture earlier...

I am sure you have been in the situation when you're running to reach a deadline and are very very far behind (read packing with the toddler... and winding up the house).

Crazy things have been happening last week and I am just glad I am well enough to travel...would have turned out to be a very expensive illness if I couldn't have!

So, I have been MIA and made a comeback with a very grainy pic... but my camera is not all that bad.

I promise you some lovely pics soon... just wanted to leave with some pics from my vacations earlier...

Tuesday, June 14, 2011

Secret Recipe Club: Supposed Chicken Broccoli Stir Fry = Cottage Cheese & Veggie Stir Fry !

http://thruthebugsonmywindshield.wordpress.com/2010/05/26/chicken-broccoli-stir-fry/Amanda's idea of the secret recipe club is really working and with a 100 odd participants it is a really fun event to take part in. We are assigned a blog in secret and have to cook from it and all the particpants post on the same day... the fun part is looking through all the blogs and seeing who has cooked what!

This time around I was assigned Thru the Bugs on my Windshield a great blog written by Suz and all her experiences of travelling and eating along the way... she has some great recipes and pics and it was a tough choice to make but I will explain you why in a minute.

Last week I got back from a visit to my mum's and was ill with my sinuses playing up, a fever, a bad back and the works...

But let me hit on the highlights... going to your mum's is always great - don't you like how you get to kickback and relax while she says she has got everything in control.

You get to eat your favorite  foods without having to lift a finger and they taste so much better.

You child gets taken care of and he is actually having tons of fun and getting pampered silly...

When you get back, the hub has been missing you, so YOU get pampered silly :)

And then after my l'il illness I am off to another vacay with the hub and the bub... and will share all once I am back!

I am going to eat to my hearts content, not care about my weight (and neither should you on vacation), do as much site-seeing as the tot permits and drink in as much of the culture and atmosphere as I can...

Now, with the falling sick and packing and ensuring we are absolutely organised for the trip within 10 days of having come back from my mom's  (read: dumping clothes in washing machine, sending them to be ironed, ensuring baby has enough under garments, food to eat on flight, what's with the sudden weight restrictions on luggage, remebering to cart the potty seat - we don't like ugly pots and want to make them our own etc I had my hands quite full)

This recipe just stuck out the perfect thing to do with my leftovers... as I am in the process of winding up my kitchen. While you read this I am already off on my vacation... You can read this recipe here but basically I just made it my own... asi t easily adaptable!

I know you do not see Broccoli in my pics - I had to leave the day before I cooked and pictured this and my hubby and baby both are not fans of Broccoli so I just left it out. Also, I was using up the leftovers in my fridge...

Basically, take a huge wok, heat it with a little oil and then I added the veggies in a different order from Suz....with due respect to the original recipe it was supposed to be something to do with leftovers and I am blogging a couple of hours before I have to catch my flight with a very supportive hubby finishing all my last minute packing...

Ingredients:
Veggies sliced - whatever you have on hand depending on the portion of rice
I used one onion sliced
1/2  a small carrot
1 tomato cubed
4-5 mushrooms thinly sliced
6-7 cashews fried
1 egg
shredded chicken - my toddler decided to munch on while I cooked so I had to add some cottage cheese
1 cup cooked rice

Method
I added some onions / scallions and carrots, mushrooms (let the water dry off), tomatoes and then broke an egg into this and just scrambled it. I seasoned this with salt, pepper and a bit of paprika & soy sauce.

Yeah, the egg's my addition - my dad does this great egg fried rice and when I started doing this I had this sudden urge to get the same flavor in and I had one lone egg staring at me =  yeah, why not.

Then I added the rice into this and gave it a good stir so it absorbs the flavors... and ta da... we are done.

I topped this off with cooked cottage cheese  since the chicken I had planned to add was munched off in front of me by my toddler, some fried cashews for extra crunch (the only nut my toddler wilfully eats) and my leftover rice was ready!

The flavors are nice... the tomato adds a nice tang which we Indians are used to in our dishes... so I hope you go and try this out!

I really apologize for the pic as the camera has been packed and this is my very old cellphone trying to do it's work!


Monday, May 23, 2011

100th POST & A Giveaway!

Dear All,

I am currently visiting my mom and do not have any pics or lovely recipes for you... BUT please, please leave me a COMMENT if my BLOG has touched you in any way - made you a laugh, cry or think about food or made you relate to any of the posts in any way!

I am always complaining about how I want to be showered by some COMMENT love... and I will send you a small package :)!

And pics and recipes will be up soon :)!!!

Lots of Love,
Ruchi.

Wednesday, May 18, 2011

Chocolate Chunk & Walnut Cookies - a very easy one bowl cookie


Notice, how all my recipes call for "1 Bowl" nowadays. With the temperature hitting 44C in Delhi all I can think of, are ways to stay as far away from the kitchen as possible. I even know people who have air-conditioning in their kitchens 'coz most mom's ending up spending a huge part of their day in the kitchen!

Anywhooo, I wanted to do something quick and with oats, maybe a little bit more nutty - what is your favorite combo for cookies?

I have been hooked onto Ootmeal cookies since I studied in the US. I remember all and any event always had huge cookie platters laid out and Oatmeal Raisin, Peanut Butter & Chocolate Chip Cookies were just always available to snack on around college. That is when I discovered S'mores... but more on that later.

I got up from a bad dream of having missed some Comp. Sci paper...

It's a blessing how food seems to solve all problems in my life.

Bad Dream = Nice Big Cookie with my Coffee Milk Shake. Big Ouch-y / Boo Boo to the toddler = A l'il bit of Chocolate love. Bad day at work for the hub = YUM-O Grilled Chicken legs for dinner.


Does food manage to solve all your problems too? Then these cookies are a must bake - for the borken heart, for the bad job interview, for the extra 10 minutes on the treadmill, for the toddler who has been naughty - this cookie can bring an instant smile to anyone's face.


Ingredients:
11/2 Cup all purpose flour
3 cups oats
2 tsp vanilla essence
2 eggs
3/4 cup packed brown sugar
3/4 cup butter


Add-ons
1/2 cup walnuts - toasted
1/2 cup chocolate chunks from your favorite chocolate
1/2 cup peanut butter


Method:
Cream the butter and sugar together with an electric mixer. Add the eggs one by one and cream till light and fluffy. Add vanilla essence. Now take a rubber spatula and mix in the flour first and then the oats, slowly.


I did 2 versions - and divided the dough into half in 2 bowls. To one bowl I added chocolate chunks and walnuts (quartered or smaller). And to one bowl I added peanut butter.


 I scooped 1 tablespoon of dough per cookie and baked them in a pre-heated oven at 179 degrees for 10 minutes. You remove them while they look slightly soft to get chewy cookies and cook them for another 2 minutes if you want them crisp.


This is my 99th post... so excited and am hoping to arrange some kind of give-away on the 100th post! 

Wordless Wednesday: Treats that I take orders on...

Monday, May 16, 2011

The Secret Recipe Club - Perfect MANGO Pound Cake


I found a really great blog and a great pound cake recipe thanks to Amanda's Cookin who is a hosting a fabulous event called The Secret Recipe Club. You are allotted a blog once a month and you can choose to make anything from it in "Secret". Then on a given day and time all the bloggers from The Secret Recipe Club put up a blog post that reveals the recipe and blogger they have blogged about. Since, it is not revealed till the particular day - it is all a big secret till the big D-day and everyone is looking forward to seeing who blogged about whom and which of their recipes were featured!

The blog I was given is Once A Month Mom - a great concept blog that talks about cooking once a month in bulk and freezing food so that you can provide your family, especially your kids, fresh food to eat - it helps you to save money and eat more healthily. They have a a whole lot of ideas going on there so you must go on and have a peep.

Now, they were a lot of wonderful recipes out there but the one that caught my eye was of a Perfect Pound Cake... and how could I make it perfect by adding my own inputs to it - was a very last minute Mango-ey twist in the tale.

When I read the recipe one night I thought I had hit jackpot and I had all the ingredients to put it together but realized I was missing condensed milk - one of it's important ingredient and then a few nail biting moments followed to a very gorgeous, moist and flavorful Mango Pound Cake.

Kelly @ OAMM got this recipe from Jun-Blog and the beautiful pound cake was served with luscious strawberries...


So lets look at the ingredients...everything that you'd usually be stocked in on - my changes are added in italics
Ingredients
1 cup unsalted butter - reduced the quantity to 1/2 salted butter & 1/4 canola oil
11/3 cup all purpose flour
3/4tsp baking powder - I think I only added 1/2 tsp
1/4 tsp cinnamon - omitted
1/2 cup sugar
2 tsp vanilla extract
1/2 tsp salt - omitted
3/4 cup organic condensed milk - substituted with 3/4 cup fresh mango puree sweetened with a couple of tablespoons of sugar since my mangoes weren't too sweet
3 large eggs

Method:
If you want the original recipe you can follow it here

My recipe is a bit different
I whisked the butter and then added the sugar and vanilla and beat it with an electric beater. I added the eggs to this and whisked till everything was creamy.
I added the all purpose flour and mixed it together with a whisk till it just came together. I then added the mango puree with a very light hand. I wanted to create swirls and do a two toned cake but my cake batter and mango were almost a similar golden-orange hue.
I baked it in a pre-heated oven an 179C for 50 minutes and I didn't turn it out of the pan immediately after it came out of the oven so the whole cake seemed to sink a bit.

I had a couple of tablespoons of mango puree remaining so I added some icing sugar in it and created a glaze for the cake. It was lapped up before I could chop up some fresh mangoes to serve it with.

Few observations:

It tasted better after it cooled down and have been refrigerated. It was as moist and didn't dry out. It was not too sweet and if you want to make it really really sweet - I would increase the sugar from 1/2 cup to 3/4 cup. I would also leave out 1 egg and bake this with 2 eggs 'coz I found the taste slightly egg-y but no-one else seemed to complain!


Sunday, May 15, 2011

Go to Breakfast - Rava Uttapam - Savory Pancake


This is the easiest breakfast I've ever made, it is my son's absolute favorite since he was a 1 year old and now it's my hubby's favorite too. Anytime, I am out of breakfast ideas in the morning or I didn't feed the family a good dinner or I need to see a bright cheery smile on their face 'coz they have had a bad night - I just put this one together!

It never requires planning in my kitchen 'coz it requires only TWO Ingredients - yeah, you got that right!
Rava - Cream of Wheat or Semolina flour & Ordinary Yogurt - I think you can make this with all rice flour too but I haven't tried it. For my international users, when I lived in the US, I used to buy some groceries online at Patel Brothers - but I don't know if they ship to the UK.

Perfect for bachelors and for a meal you want to put together when you are alone and don't want to cook something elaborate.

Ingredients:
1/2 cup Rava - Cream of Wheat
1/2 cup ordinary yogurt - any kind - it just shouldn't be sweet
1-2 teaspoons oil - optional
1/2 tsp salt
1/4 onion & tomato finely chopped - optional
finely chopped coriander for garnishing - optional


Method:
Mix the rava and yogurt together to form a batter. It should have the consistency of pancake batter - so add a couple of tablespoons of water to this to make the batter easily spreadable. Add the salt and the oil. Mix and let rest for 20 mins on the counter.

You can use this immediately but I've noticed - letting it sit makes it taste better.

Heat a skillet you use for making pancakes or dosas. Pour a ladlefull of batter and spread a bit. Add the chopped onions, tomatoes and coriander. You can also sprinkle some sort of spice at this time - I sprinkle some finely ground paprika or sambhar powder. Add 1-2 teaspoons of oil around the edges for cooking.

Let it cook for a couple of minutes on one side and then flip. All in all, this takes longer to cook than a pancake but if you're cooking it for more than 10 minutes you're going to get a burnt pancake!
Cook for another couple of minutes, till the batter looks set.

This is a very forgiving recipe, it tastes great even without all the veggies - just plain or with a little grated cheese.

Garnish with coriander (or without) and enjoy!

Tips:
I've started adding oil to the batter as I noticed it slips of the skillet easily and is very moist.
You can add some chopped capsicum, grated carrots and grated cheese to this too while cooking.
If you're making this for the first time, it may not come of the skillet easily but just wipe the skillet with a wet cloth and try it again...

Just realized I wanted to send it as an entry to Breakfast Mela hosted by the very talented Srivalli at Cooking 4 All Seasons so re-posting it.

Sunday, May 8, 2011

When God Created Mothers by Erma Bombeck

When the Good Lord was creating mothers, He was into his sixth day of “overtime” when an angel appeared and said, “You’re doing a lot of fiddling around on this one.”
And the Lord said, “Have you read the specs on this order?
  • She has to be completely washable, but not plastic;
  • Have 180 movable parts... all replaceable;
  • Run on black coffee and leftovers;
  • Have a lap that disappears when she stands up;
  • A kiss that can cure anything from a broken leg to a disappointed love affair;
  • And six pairs of hands.”
The angel shook her head slowly and said, “Six pairs of hands... no way.”
“It’s not the hands that are causing me problems,” said the Lord. “It’s the three pairs of eyes that mothers have to have.”
“That’s on the standard model?” asked the angel.

I was reading a fellow food blogger's page and came across this link she shared... a must read:
The following column was her Mother’s Day column for May 12, 1974. Read complete article here

Saturday, May 7, 2011

Namak Paare (Mathri) / Crispy Savory Bites

Though I am a North Indian, I am born and brought up in Mumbai, a very cosmopolitan city, still has a staple of typical Gujrati and Maharashtrian snacks that we savor during tea-time - chivda (sauted flattened rice with peanuts) , bhel (puffed rice), idlis, dhoklas. These are very different from what North Indians like to snack on - it's usually fried fare like samosas, fried savories like pakodas, namak paare, mathri's etc

This is something my son was introduced to after we came to Delhi and though he hasn't take a big fancy to it, we make it occasionally for a lunch box treat. It's mighty yummy and full of oil and deep fried so you may want to stay away from it if you're on a diet of some sort and cook it only for the kids. It's like a very crispy savory cookie.

I am giving you a rough recipe for this 'coz everything that likes to be fried, I like to keep away from. I give my cook (yeah, I have someone to help me with my kitchen chores) some basic instructions and he whips them up from me. My MIL makes some yummy ones too - she makes them round. These are more bite sized so they can be packed as a snack.

Ingredients

1 cup all purpose flour
1 cup semolina flour / rava
2-3 tablespoons oil
1/4 tsp carrom seeds
1/2 tsp salt
3/4 cup water

Method:

Mix all the dry ingredients. Make a well in it and pour the oil or ghee (please do not try this with butter) and mix it all together with your hands. Now, add water to this mixture a couple of tablespoons at a time to bring the dough together into a stiff dough. Use a rolling pin and take 1/2 of the dough and roll it out as thin as you can - about 1/4 inch into a round. Then cut it length and breadth wise into strips to make these tiny sized pieces and pour into hot oil and fry for a couple of mins each side till nice and browned. Remove onto a tissue paper and when absolutely cooled store in an air tight box.

These are very rough instructions and not detailed at all but email me and I can answer all your queries on this.

This is a pic of a plateful of namak paare's sitting on my son's favorite chair waiting for him to attack!

Friday, May 6, 2011

Banana Walnut Bread with Chocolate Chips - healthy party treats for kids!


When I first started making banana bread with a hint of chocolate in the flour I had a firm admirer in my son and would be baking it every other week but he soon decided that he doesn't like bananas. So he gave up eating banana bread and used to tell me "Mom, that cake has bananas..."

Now, he's been in school one month and they're having a party. I wanted to make them a healthy yet delicious snack and nowadays children seem to be all about chocolate. All day I sound like, "Mr. No", because that's what I keep saying to him. No eating chocolate, No cuddling the rabbit, No racing towards a moving with your cycle... by the end of the day I'm thinking maybe I can't keep pace with 2.5 year old. So this, bread, which tastes more like cake is a "Yes, eat as much chocolate cake" as you like kinda bread. It's really soft and light and  airy and ONE BOWL kinda cake bread.

NOTES, before you start baking
So, I got the recipe from www.epicurious.com and the recipe is so simple but I have adapted it to suit my needs. I read a lot of the comments and people spoke about how the chocolate chips were too much - so I reduced those and the walnuts because I had to send it to class party of 2 year olds. I also layered it in just two go's and not 3 times the way they have mentioned it and didn't use an electric beater for anything - just beat it all up in a bowl. There was also a comment about how it had overflowed so I reduced the baking soda in my bread  and you will find the adapted recipe below. Regular sugar was subbed by brown sugar but you can use any sugar and increase it 2 cups if you want because the cake was made less sweet keeping sugar-high kids in mind. I made two loaves so half the recipe when you try it!

Ingredients:
21/2 cups all purpose flour (I made it with 2 cups flour and 1 cup millet flour and the result was just as yum
                                      but a bit denser)
1/2 cup Hershey's chocolate powder
1/2 canola oil and 1/2 cup butter
3 long bananas mashed
2 tsp vanilla essence
3 large eggs (for one loaf you can use 1 egg and if you seem to have less liquid in your bread, add a dash of                        milk)
1/4 cups toasted walnuts/ loaf cut into small pieces
1/4 cup small chocolate chips/loaf
2tsp baking powder
1tsp baking soda
2 X 3/4 cup brown sugar

Method:
Pre-heat the oven to 175C. Line and prepare two loaf tins.

Mash the bananas really well and add the vanilla essence to them. Add the softened butter and oil mixture to this and really beat well. Add the brown sugar and beat till dissolved. Add the eggs and beat till fluffy.

Now add the flour in 3 parts and mix so it just all comes together. Do not over mix or you have a pretty hard bread.

Now, into each of the two loaves put 1/4 of the batter each. Top with toasted walnuts and chocolate chips. Top with the remaining 1/4 cup of batter each.  Now mix together using a knife and then I leveled the batter a bit and decorated it with toasted almonds before baking. I also made a round cake out of the same batter for the home - the pictures of which came out better. I put the two loaves in a tray and covered with pretty paper to take to school and forgot to take a picture of them before... so bare with the grainy looking picture please. The bread was cake like and very light and melted into the mouth!

The bread took about 55 minutes to bake unlike the 1 hour and 5 minutes mentioned in the original recipe.I also loosely covered the loaves with foil in the last 10 minutes to make sure it didn't over brown or burn on the top since I had to send it to school.

Happy Baking - just in time for the summer vacation in India! Kids are perfect helpers. Just measure out everything and keep it in bowls... and let your little helpers mash the bananas and beat it all together - am sure the bread / cake would be tastier!

Thursday, May 5, 2011

First Award Ever!!!!

I wanted to thank Reva from kaarasaaram.com for the lovely event she hosted and the appreciation it got my way! I have never won an award at my blog and am super duper excited!!!! YAY!!!!


I am really looking forward to receiving my cookbooks :D!!!!
    

Tuesday, May 3, 2011

Simple (One Bowl) Chocolate Cake

It is 40C in Delhi and we are literally melting in the sweltering heat... regular fare for us includes rice, lentils, veggies or indian bread (roti) and all I feel like doing is sipping on tons of Leomande or Tang and maybe nibble on some loaf cakes in the evening with Cold Coffee.

In times like this I do not feel like entering my kitchen and standing next to the pre-heated oven...

This definitely calls for a one bowl chocolate cake recipe with some whole wheat flour, yogurt and ground almonds... (makes you feel less guilty about missing that workout!)

I am still in the process of perfecting the recipe...

Anyone, have a healthy wholesome chocolate loaf cake recipe please leave a comment... till then why don't I leave you with a picture!


Friday, April 29, 2011

Mango Coconut Macaroon Tart... (Still can't seem to get enough of Mangoes!)


Things have been moving full throttle in the summer... after the baby got over a bout of cold and cough... it was the hub and the MIL that followed suit. The temperatures in Delhi are touching 40 C and all I can think about is sitting in my air-conditioned room and not stepping out. The only thing the heat is not stopping me from doing is eating... and I better watch the scales or I am going to have to buy a whole new wardrobe for my vacation!!!!

Besides the million things are craving my attention on the home front I have an aunt who passed away recently in a very untimely manner - but when I think of her - a very cheery face comes to my mind who was always smiling and ready to get into a kitchen and cook up a storm for her guests at a mo's notice - a very nice way to remember someone I must say and I wish I could always be remembered smiling but that is not one of my best traits - (*Note to self: Smile more often and spread happiness... it's very contagious)

Coming back to the tart, the heat, maid issues, baby adjusting to school have all been eating away on my time and earlier I managed to pack my baking at around 4-5am but by the time I hit the bed, I am asleep before my baby and manage to barely struggle out 7am. And, if I told you I had help to clean and swab and dust and put my utensils away some of you who do not live in India would be jealous but trust me I would not survive here without all the people helping me!

I wanted to bake something different (No chocolate) and got my hands on some desiccated coconut. You know I was obsessed with strawberries for a while but as the summer trudges along, mangoes are now, holding my interest! I wanted a nice nutty and nutritious tart base and had some ragi flour lying around (I had earlier used it while making biscotti and it had imparted a nice nutty, almost chocolaty flavor to my biscotti) - so in it went with a small amount of almonds and butter and that was my tart base. Now, all I needed to do was think of a filling and was very inspired by www.smittenkitchen.com!

Ingredients for the Tart:
1/4 cup almonds
1 cup ragi / millet flour
1/4 cup all purpose flour
a little lesser than 1/2 cup butter
2 tablespoons brown sugar

Method:
Preheat the oven to 200C.  I just pulsed everything together in my mixer and cooled it a bit in a my fridge. Though, the pastry was still soft to roll out I almost had to roll it into the tart pan I was baking it into. It fit a 6" round tart tin.I blind baked it with beans. I rolled out the tart and put it in my tart tin. Forked it a bit. Put a parchment over it, added some lentils and beans (trick from Rachel Allen bake) and then baked it for about 20 minutes.

Ingredients for filling:
3 large egg whites
6 tablespoons brown sugar
1 large mango cut into bite sized chunks
100grams desiccated coconut

Method:
Stir together egg whites, coconut and sugar. Now spoon the mixture into the tart tin and add chunks of mango to the tart so the fruit is visible. Bake for 20-25 minutes till the peaks are browned. The filling of the recipe is taken from a book called Super Natural Everyday - waiting to lay my hands on it and the pairing they have used is Blackberries and Coconut and some pistachios pressed into the filling in the end (fresh blackberries are almost impossible to lay your hands on in the summer in India). I thought Mango and Coconut were yumm too!

The tart was really yummy and the filling really moist and coconutty. The only problem I had with this tart was that that mangoes kept losing moisture as the day waned... so I would put some sort of preserves on top of the mangoes after the tart is baked to preserve them if you are serving this later... must say this tart didn't last past a few hours! The base was very very soft and biscutty and perfectly paired with the coconut and mango!

MMBadge-ToplessTarts-04-2011
This is also going to make the perfect entry to the Monthly Mingle - a great event started by Meeta of What's For Lunch Honey... I think I may have just made the deadline :)! This month's mingle is being hosted by Cook Sister - a very scary challenge for me since I had never ever baked a tart in my life!!! But alls well that ends well I say...


Saturday, April 23, 2011

Mango Pancakes - it's raining Mangoes!


A Double Post... coz I am finally back - was feeling really lost without my laptop and have been waiting to blog for the last few days...

Summer is here and there is an abundance of fruit everywhere. India is known for it's yummilicious mangoes in the summer and you have over a 100 varieties available in the country. If I am obsessed about baking and cooking with strawberries my love for Mangoes cannot be left far behind. I have grown up on  staple diet of luscious orangey Alphonso Mangoes and just can't resist picking up some when I am at a fruit vendors. Previously, I did the following Mango posts Mango Cream Cake , Mango Shrikhand,  Mango Yogurt Mousse , Mango Panna , Mangoes & Cream Ice cream .

Now, I landed up with a batch of not so sweet mangoes and wanted to do something different with them... the morning was rainy, I had my cuppa coffee in my hand and was standing in the balcony (Delhi / Gurgaon has been having weird weather the past week), reminiscing about similar weather in Koh Samui a couple of years back and how I was stuffing my face with some Mango Pancakes. Now, I could really stuff a number of panckes into my mouth at that time 'coz I was a couple of months pregnant and that totally gave me the license to eat my heart out!

Anyways, coming back to the pancakes... I wanted to put together something easy in a jiffy with the ingredients I had on hand and was googling around for an easy recipe but didn't find any so put together mine after reading a ton of them!

Ingredients:

1 up all purpose flour
3/4 cup milk & a little more incase your batter lacks the consistency of regular pancakes
1 egg
1/2 tsp baking soda
3 tablespoons brown sugar
1 tsp vanilla essence
1 mango chopped into small bite sized pieces

I mixed all the ingredients, except the mangoes, for the pancake batter and let it sit on the counter for a couple about 30 minutes. As you can see from my pictures my mangoes pieces were chunks rather than bite sized and I added them to the batter when I poured it into my non-stick. The flavour was yummy! I sprinkled some powdered sugar on them and enjoyed them with a bit of honey but the rest of the family doused them with the eternal favorite Maple Syrup. I am guessing mango essence instead of vanilla essence can also be tried but they had a pretty nice mango-ey flavor to them!


I also wanted to submit this post for Healing Foods - Mango being hosted this month by the talented Reva from Kaarasaaram. Healing Food is the brain child of Cooking with Siri - a young working girl and part-time blogger! She has an amazing collection of recipes and better pictures to match so do hop on over to her blog to catch up on some great recipes.


I am so happy with the feedback that I have received for this recipe... that it has literally left me beaming! I am going to submit this post to the Breakfast Club. Krithi from http://krithiskitchen.blogspot.com
 has been kind enough to let me submit this post to the Breakfast Club #10 that she is guest hosting. It is originally hosted by  Helen from  Fuss Free Flavours, both really great blogs that I have discovered! I am so glad to be able to discover such great blogs with awesome recipes and pictures!

Melting in the mouth Mutton Kebab / Shammi Burgers from scratch...

I have been a non-vegetarian all my life except for a brief period of say 3-4 years when I tried to be completely vegetarian - but just didn't work. My hub and the child are hard core carnivores and are happy eating chicken a couple of times a week. I do cook fish and chicken in the house but I am not a fan of red meat and neither do we cook pork or beef in the house. But this kebab converted me completely.

Now, my MIL is over to spend some time with us and makes a mean mutton curry (more on that later...) but I thought it would be a treat to get her to make some Mutton Shammi Kebabs and turn them into Mutton burgers for dinner.

So, first we went about getting the Shammi recipe which is an age old and been in the family for a while and I got some pics of her cooking it too! So, you will have almost a step by step view of this dish and it is super easy!

It's basically a mix of meat and uses some lentils as a binder. An egg yolk here, some fresh bread crumbs added to the mix with tons of indian spices (garam masala) and we had our finger lickin' burgers ready. Ohh, since this was a night shoot the lighting is really bad so please pardon the pictures! We dressed the burgers up with a mayo-ketchup sauce, sauted onions and tomatoes and jalapenos - I know all of which seems hard to distinguish from the pics below!


Friday, April 22, 2011

Sorry y'all

I know I do the disappearing act all the time but this year as usual has been testing me...

Now, my laptops out like a dead lightbulb with all my pics n all and I am in the process of getting my act back together. Plus, the hub n the toddler are unwell... So hang in there and I shall be back soon.

Would love to see some comments...nearing my 100th post soon and would love to organize a special giveaway for all my readers!

Thursday, April 14, 2011

Sunny Side Up - Eggs n' Chips for the hungry baby!

They are some foods that bring back memories of childhood and are categorized as comfort food. They don't necessarily have to be butter and sugar laden but just foods that comfort you and make you happy. I remember my #1 comfort food is simple tur dal and chawal (Yellow Lentils with Rice) and then the list goes on...

Now, to be fair to my mom, she is a great cook but hates stepping into the kitchen or even cooking that much. But with dad it is another story... he lovers pottering around in the kitchen - throwing together anything that's there on hand and coming up with some brilliant food to eat... be it simple things like egg and vegetable fried rice, anything with chicken and these eggs. I don't know how they originated in our house but they are a great treat for my hubby and son who get to eat Chip (Wafers) N' Eggs all in one first thing in the morning!

Today was a holiday in India and to surprise the family I prepared some Eggs n Chips and well there isn't much to the recipe there is a technique which I will let you figure out yourself  - though they are some clues and that's why I put up the pics of the eggs in my pan!

And it's almost the weekend so hang in there...


Monday, April 11, 2011

Chocolate Yogurt Cupcakes


So, since I recovered from Typhoid all I can think of is food. I feel like eating all the time... almost non-stop! Sometimes you go through an event or a personal high or low or an illness that makes your body rhythms go funny and puts your body into a high stress zone - anyone been there? Body reacts to stress in different way - but mine goes into EAT mode.

I will get up to a cup of tea with toast, then have a bad have breakfast, then go for a 20 minute walk and get the munchies, then play with my toddler and want lunch. Phew! Sweets are on my mind before I've completed lunch and by the time I put my toddler to sleep it's tea time again... you get the drift...

So, I decided I would have to take stock of my life on my own and can't blame events in my life for eating. Now, with all the baking I do it is difficult to resist. And I love the smell of creaming butter and sugar for cakes but I decided to start baking healthy till I lose some of the weight I have been beginning to gain. Another commitment I have made to myself is to walk twice a day for at least 30 minutes and not get lazy about it - no short cuts to losing weight, I say.

I am going to bake only twice a week and cook healthier meals - I already do but I will eat the healthy meals and fried food will only be twice a week. I guess thats fair.. lets see how long it lasts.

So, I googled up some healthy recipes and I couldn't find the perfect recipe for the perfect Chocolate Cupcake recipe. Some didn't have whole wheat flour, some didn't have eggs, some didn't have yogurt and some didn't have fruit... so I thought to myself - lets just take the basics and make the rest along the way.

Ingredients:
3/4 cup all purpose flour
1/2 cup whole wheat flour
1 cup brown sugar
1/4 cup oil (canola or olive)
1/2 cup yogurt
1 small jar Heinz pear baby food (thats the only pureed fruit I had lying around)
1/4 cup Hershey's cocoa powder
1/2 tsp baking soda
1 tsp baking powder
1 egg (optional)
1/3 cup small chocolate chips (on my son's insistence!)

Recipe:
Beat the oil and sugar together. Add egg and beat till fluffy. (I used a wooden spoon for all my mixing and definitely do not over mix.

Then add the yogurt and the pear puree and beat well for a couple of minutes or use your electric mixer.

Now to this add the dry ingredients - bit by bit (sifted mixture of the two flours and cocoa powder, baking soda and baking powder).

In the end add the chocolate chips.

Bake for 20 minutes in a pre-heated oven at 177 F.

I must say they tasted great warm with a slight drizzle of low fat cream mixed with some cocoa powder and a spoonful of icing sugar! Cold - they were not that great - so maybe I will try it again without the whole wheat flour.

Also, I added a couple of M&M's to give you something to think about when you're baking for Easter... maybe you could use chocolate eggs?

Monday, April 4, 2011

Mangoes & Cream Icecream!

The summer offers a bounty of fruits in the prettiest of colors and shapes. Grapes, Chikoos, Strawberries, Mangoes - it is a delight to eat them as is or use them in cooking and cool desserts.

The focus has shifted from strawberries to mangoes in my house and we are getting plenty of them in India! Yummy, Perry's and Alphonsos, Safedas and Hamams - all these different varieties of mangoes are treats for us :)!

Anyways, I had some mascarpone expiring and wanted to make some dessert with it - had experimented with some Strawberry Mascarpone Icecream last year and with the temperatures soaring I thought why not try and incorporates some mangoes and whipped cream and make my hubby's favorite icecream... so I did this 4 ingredient ice cream in a jiffy and came up with some yummilicous Mangos and Cream Icecream.

My son liked it a bit melted with sprinkles and my hubby liked it off the stick since it had enough mango chunks to keep him busy. Thought I would leave you with some pics and post the recipe later.


Saturday, April 2, 2011

Granola Bars - another healthy snack to make and store


The summer has set in and it is hot beyond belief already - what happened to the slight cool wind that was blowing last week???? The l'il one doesn't understand why the weather has turned so hostile and he has to stay in during the day? Also, the appetite has suddenly shrunk and all he wants to do is sip on liquids and munch on something light. He is isn't much of a fruit fan so have been thinking of various ways to get some fruit into his diet but making sure the snack / food is wholesome (using whole wheat, puffed rice and oats) and these is a "YUMMY" element to it otherwise, it doesn't get eaten! Made some fresh mangoes and cream lollies, strawberry and yogurt mousse but those posts are for another day!

My love affair with Granola started way back in 2000 when I went to study in the US. I put on the freshmen 15 (more like 25) in the first year and the latter years were always spent in combating this weight gain. I wasn't a drinker or a big fan of pizzas but when dinner was done and over with at 800pm and there were long hours of programming looking up at you, one needed some carbs to survive the night! In the day we would snack on high carb cafeteria food - either loaded potatoes, pasta, cheeze grilled, donuts and the works, also there was unlimited soda (Gosh, never in my life had I been allowed more than a glass), also the lovely sugary cereals (I could have lived on Lucky Charms) - you're getting the drift. Once I realized what hit me I had to start putting in the appropriate measures and putting the rights stops to make sure I went down from a size 8 and never reached that weight again!

Healthy wholesome food became my mantra - granola bars, whole wheat bread, pita with veggies and lean meats, no soda and a little help from Slim Fast too...  yes very desperate measures. But when I got myself a job and was living on my own my eating habits just improved and it was always home cooked meals for me and the weight started shedding on its own!

Anyway's, wayy off the topic I am - so I thought I would do some oat cookies since he had give up those a while back with some fruit (figs, dates, strawberries) and some nuts and chocolate chips??? But, then I didn't want to add flour to my recipe and neither did I want to spend an hour for making something in this heat ( = no beating butter, sugar, eggs, making dough, cooling dough, shaping dough). yet, I needed something he could carry down with him when he goes to the park in the day or place in his snack box when he starts school... and then it dawned to me why not make his some granola bars and cut them into bite size pieces for him?

I first raided my pantry to see what I had on hand? Then the internet to look up some recipes - Granola Bars need - Grains (Oats), Dried Fruit (Figs, Dates, cranberry), Nuts, Liquid to Bind (Oil, Honey, Butter, Egg) and you are good to put it all together! Phew, I thought I would just put it together with whatever I had and if the recipe turned out fine and got "APPROVED" then would do a re-run of it later. So, it turns out I had not dried fruits but read on to what I had and how it turned out...

So here goes

Ingredients:
2 cups quick cooking oats (recipes usually call for old- fashioned oats but I didn't have any)
1/2 cup roasted almonds coarsely chopped
1/2 cup roasted walnuts coarsely chopped
1/2 cup chopped strawberries
1/2 cup chocolate chips
1/2 cup oil
1/2 tsp baking soda
1/4 cup strawberry jam
3/4 cup brown sugar

Recipe:
Roast the almonds and walnuts and coarsely chop in a mixie. Preheat the oven to 177F.

Put the oats, chopped almonds and walnuts together. Then added the chopped and dried fresh strawberries (you can use any dry food - I just had none on hand). Sprinkled the sugar on top and mixed it well.

I then added the oil - first 1/4cup and then another 1/4 cup and saw that it wasn't binding enough and it wasn't fruity enough. Now, most bars have honey, which is a taste I don't like. Also, golden syrup, glucose or maple syrup were options but then I wanted to heighten the taste of the strawberries so in went all the strawberry preserves I had and I just mixed it all together.

Yum, it tasted fine now and had just the right tang to it! I put it in a rectangle baking dish and then sprinkled the chocolate chips on top (the yummy factor to entice the toddler) and baked it at 177F for 25 degrees.

Cut it into rectangle and bite sized pieces for the toddler and enjoy. But, let me warn you, the mother may enjoy the healthy treat more than the child!

Thursday, March 31, 2011

Dorie's Salted Butter Break-Ups


Ever since I have set my eyes on these cookies on Purplefoodie's blog I haven't been able to keep my mind off these. I have been dreaming about these with my eyes open and sometimes I feel I can just taste them but haven't had the chance to make them!

Now, I have to usually get books shipped to India which becomes way to expensive and so I don't know a lot of cookbooks that I would love to - I have added Dorie's Around the French Table to it obviously... also, with her recipes you don't seem to go wrong and they somehow come together perfectly and all the ingredients complement each other to form some of the tastiest of treats!

Now, like I mentioned I have read the recipes a couple of times but haven't been able to get my hands on "fleur de sel" and have been on the look out for it for a long time... I thought that it would have added the extra bit of zing to my recipe but since I haven't been able to find it - I had to settle for baking it with regular salt and they were I must say scrumptious and once you started eating them you couldn't put them down!

It was a weekend and I hadn't been able to get much sleep as my toddler who is still sleeping with us kept kicking me all night and I could hear some loud blaring truck horns on the road (yeah, thats what you get for living face the Gurgaon-Faridabad highway). So I got up at around 4am to make the dough and at about 6am to bake it. By the time my help was in making my morning coffee the house was smelling full of scrumptious (yes, I am using it again to describe these) biscuits and my son literally followed his nose to the kitchen.

Once you get your hands on this recipe - you should go give it a try and not even think about waiting for any extra days or leaving it on the backburner... all the ingredients are most definitely going to be in your pantry - tea time will be a treat, your kids will love it and coffee breaks will be a delight. So go ahead and try it.

Ingredients:
1 3/4 cups all purpose flour (I added 1/2 cup whole wheat flour)
2/3 cup castor sugar
9 tbsp cold butter
3-5 tbsp cold water
2 tsp salt (I didn't have fleur de sel) and more for sprinkling

Glaze:
Egg yolk with water - but i used fresh cream

Recipe:
Put the flour, sugar and salt in a bowl and give it a quick mix.

Add the butter and start rubbing it in the dry ingredients till it forms coarse pieces - pea sized and bigger is fine.

Now add some cold water and start getting the dough together to form a ball. (I had a very soft dough even after chilling - maybe coz I did it with my hands). Wrap the dough in plastic and let it chill for an hour.

 Preheat the oven to 350F/ 170C.

Remove the dough and roll it out with a rolling pin into a rectangle. She has recommended putting a criss cross pattern with your fork on it but mine was too soft to get a pattern - so I just put a glaze. Also I rolled it in two of my fluted pastry tins so it got a nice pattern around the edges which was later hardly seen.

I then baked it in the oven for about 40 minutes and they were more golden than they should have been - I guess I should have pulled them out a little earlier.

I liked mine really crisp but they were buttery and soft inside and I cut them into triangles and they were perfect with my morning cuppa and a magazine on a lazy Sunday morning...